
Adding Continuous Integration
In the previous module, you learned how to manually push an application to a test environment from our local dev machine. Now what about running tests, and deploy to staging and production? There are many continuous integration solutions in the market. In this module, we will look one of the CI solutions and to see how to setup and configure a Jenkins instance so that we can create an end-to-end continuous integration pipeline for our Node.js application in the next module. If you already have a running Jenkins instance, you can skip this module and go straight to the next one to setup your own pipeline.
What is Jenkins
Jenkins is an open source automation tool written in Java. It provides continous integration services for application development. With a huge open source community, it provides hundreds of plugins to support building, testing, deploying, and automation for virtually any project.
It enables developers to automate end-to-end build, test, and deployment process from pushing code updates to a source repository to deploying the latest features to a production environment in minutes.
Provisioning Resources for Jenkins on Azure
To setup a Jenkins instance on Microsoft Azure, we need to provision all the required resources for Jenkins. At the end of this step, we should have two virtual machines (one Jenkins master node on an Ubuntu virtual machine and a Jenkins slave node on another VM), a storage account, virtual network, availability sets, public IP addresses and network interfaces required by the installation.
Now, let’s login to Azure CLI. If you have not installed the Azure CLI, please install the Azure CLI to provision resources using an Azure Resource Manager (ARM) template.
First login to the Azure CLI:
$ azure loginInstruct the client to switch to ARM mode:
$ azure config mode armNext, download azuredeploy.json and azuredeploy.parameters.json locally. Edit azuredeploy.parameters.json to provide values to the parameters required for the cluster. You can also refer to a sample azuredeploy.parameters.json herefor your reference.
- For
storageAccountPrefix,virtualNetworkName, anddnsName, you need to provide unique values for these fields.
To kickoff deployment on Azure, type the following in terminal:
$ azure group create --name devopsfunrgjenkins --location "West US" --deployment-name devopsfun --template-file azuredeploy.json --parameters-file azuredeploy.parameters.jsonActual deployment time may vary. It should take less than 5 minutes for provision to complete.
To verify, you can check the ProvisionState by running the following command in terminal. When the deployment is completed, the ProvisionState should go from Running to Succeeded.
$ azure group deployment show devopsfunrgjenkins devopsfun
# Sample output:
+ Getting deployments
data: DeploymentName : devopsfun
data: ResourceGroupName : devopsfunrgjenkins
data: ProvisioningState : Running
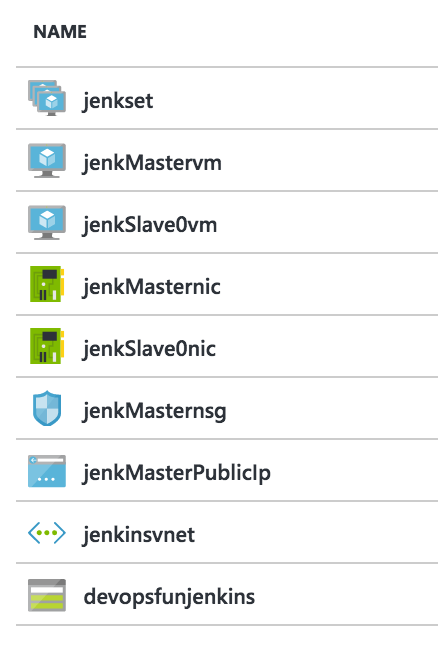
...You can also verify by logging into the Azure Portal and once deployment is done, you should see the following resources:
Configuring Jenkins Security
Once we have all the resources provisioned on Azure, let’s configure Jenkins security settings to complete the setup. By default, Jenkins allows anyone to do anything in the system. Let’s change this.
Browse to the new Jenkins instance by navigating to the URL below in your browser. Using the dnsName and region values you provided in the previous step and hit the Jenkins master server on port 8080. For example with the values we provided in the screenshot, this would be the URL: http://devopsfunjenkins.westus.cloudapp.azure.com:8080
http://<dnsName>.<region>.cloudapp.azure.com:8080
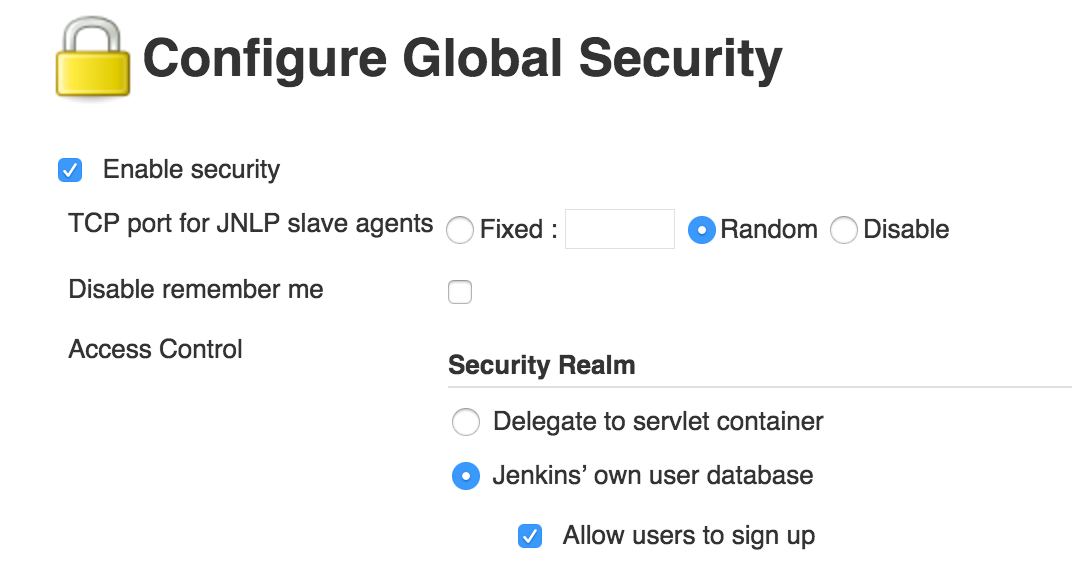
From your browser, click Manage Jenkins in the navigation sidebar and then click Configure Global Security. From the Configure Global Security page, check Enable security. Next, scroll to Access Control and select Jenkins’ own user database. Then, click Save.
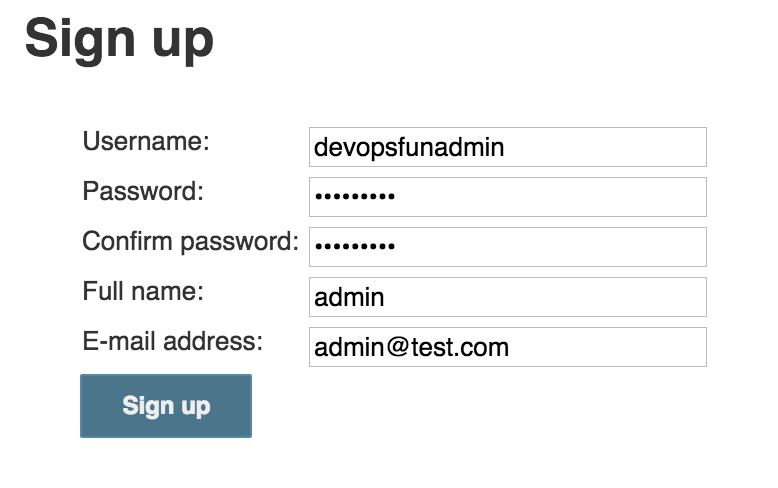
Let’s lock down the Jenkins instance to allow only your admin user to create new users and to view/administer the instance. You can always add more administrators later. First, create a user by clicking Sign up and filling out the form, then submit.
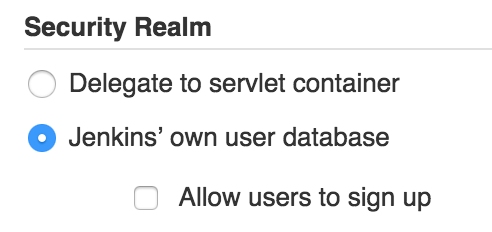
Back to the Global Security Page again. Uncheck Allow users to sign up.
Then, under Authorization select Project-based Matrix Authorization Strategy. Under the matrix table, add the recently created username “devopsfunadmin” and then check Administer under the permissions. Then Save.

Job well done! You have locked down your Jenkins instance.